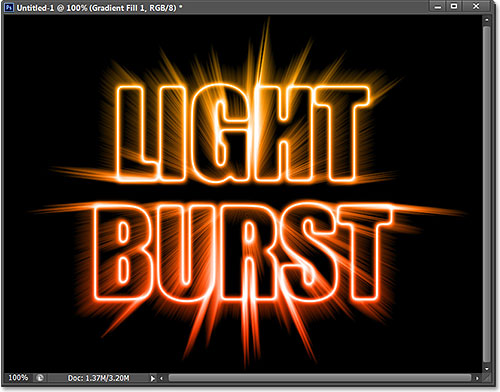
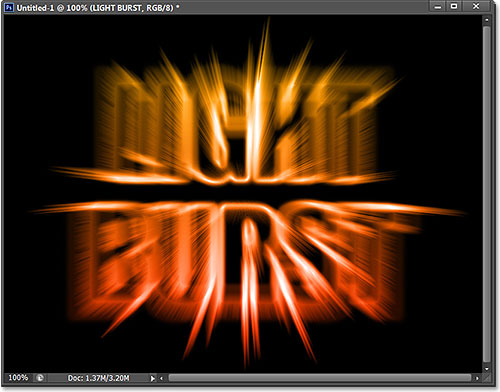
Here the effect we'll be creating. Of course, this is just one example of the effect. You can choose whatever text and colors you like:

The colorful light burst effect.
There's quite a few steps involved in creating this text effect but they're all fully explained and easy to follow, even if you're new to Photoshop. Once again, this version of the tutorial is specifically for Photoshop CS6 users. For earlier versions of Photoshop, be sure to check out the original tutorial. Let's get started!
Step 1: Create A New Photoshop Document
Let's start from scratch by creating a new document for the effect. Go up to the File menu in the Menu Bar along the top of the screen and choose New:
Going to File > New.
This opens the New Document dialog box where we can set various options for our new document, including its dimensions. For this tutorial, I'll keep things simple by selecting Web for the Preset option near the top of the dialog box, which automatically sets the Width to 800 pixels and the Height to 600 pixels. It also sets the Resolution value to 72 pixels per inch, but unless you're creating this effect for print, you don't need to worry about the resolution. The Background Contents option at the bottom should be set to White. Click OK when you're done to close out of the dialog box and a new white-filled Photoshop document will open on your screen:
The New Document dialog box.
Step 2: Add Your Text
Now that we have our new document, let's add some text. Select the Type Tool from the Tools panel along the far left of the screen:
Selecting the Type Tool.
Press the letter D on your keyboard to quick reset your Foreground and Background colors to their defaults, which will set your Foreground color to black (and your Background color to white). Photoshop uses the current Foreground color as the text color, which means your text color will now be black as well.
Next, choose your font up in the Options Bar along the top of the screen. This effect will work best with thick letters, so I'll choose Impact, and I'll set the initial size of my font to 72 pt. We'll see how to easily resize the text once we've added it. For more details on working with type in Photoshop, be sure to check out our full Photoshop Type Essentialstutorial:

Setting the font options in the Options Bar.
With the Type Tool in hand, your font options set and black as your text color, click inside the document and add your text. I'll type the words "LIGHT BURST":
Adding my text.
When you're done, click the checkmark in the Options Bar to accept it and exit out of text editing mode:

Clicking the checkmark in the Options Bar.
If we take a quick look in the Layers panel, we see that the text appears on a Type layer above the white-filled Background layer:
The Layers panel showing the newly added Type layer.
Step 3: Resize The Text With Free Transform
If your text appears too small, as mine does, we can easily resize it using Photoshop's Free Transform command. Go up to the Edit menu at the top of the screen and choose Free Transform:
Going to Edit > Free Transform.
This places the Free Transform box and handles (the little squares) around the text. To resize the text, click and drag any of the corner handles. Press and hold your Shift key as you drag the handles to constrain the proportions of your text so you don't distort the shape of the letters (make sure you release your mouse button first before releasing the Shift key). You can also move the text into position by clicking anywhere inside the Free Transform bounding box and dragging with your mouse. When you're done, press Enter (Win) / Return (Mac) on your keyboard to accept it and exit out of Free Transform mode:
Clicking and dragging the corner handles to resize the text.
Step 4: Rasterize The Type Layer
Next, we need to convert our text from a Type layer into pixels, a process known as rasterizing. Go up to the Type menu (new in CS6) at the top of the screen and choose Rasterize Type Layer:
Going to Type > Rasterize Type Layer.
Nothing will seem to have happened to the text, but if we look in the Layers panel, we see that our Type layer has been converted into a standard pixel-based layer:
The Type layer is now a pixel-based layer.
Step 5: Save The Text As A Selection
We need to create a selection outline from our text and then save the selection so we can load it again later. To create the selection outline, press and hold the Ctrl (Win) / Command (Mac) key on your keyboard and click directly on your text layer's preview thumbnail in the Layers panel:
Clicking on the preview thumbnail while holding down the Ctrl (Win) / Command (Mac) key.
Photoshop loads a selection around the letters:
A selection outline appears around the text.
To save the selection, switch over to your Channels panel by clicking on its name tab. You'll find the Channels panel grouped in beside the Layers panel:
Clicking the tab for the Channels panel.
Then, click on the Save Selection As Channel icon at the bottom of the Channels panel (second icon from the left):

Clicking the Save Selection As Channel icon.
A new channel named Alpha 1 appears below the Red, Green and Blue channels. Our selection is now saved:
The selection has been saved as a new channel named Alpha 1.
Switch back from the Channels panel to your Layers panel by clicking on its name tab:
Switching back to the Layers panel.
We don't need the selection outline around the text anymore, so go up to the Select menu at the top of the screen and choose Deselect. Or, simply press Ctrl+D (Win) / Command+D (Mac) on your keyboard to deselect it with the shortcut:
Going to Select > Deselect.
Step 6: Fill The Area Around The Text With White
Click on the Background layer's visibility icon (the little eyeball) to temporarily hide the Background layer for a moment:
Clicking the visibility icon for the Background layer.
With the white-filled Background layer hidden, we're seeing only the text layer in the document. The gray and white checkerboard pattern surrounding the letters is Photoshop's way of representing transparency, which means all the space around the text on the layer is currently empty:
The area surrounding the text on the layer is transparent.
We need to fill the empty space with white without affecting our black text, and we can do that using Photoshop's Fill command. Go up to the Edit menu at the top of the screen and choose Fill:
Going to Edit > Fill.
This opens the Fill dialog box. Set the Use option at the top to White, then set the Blending Mode option to Multiply:
Setting the Fill options.
Click OK to close out of the Fill dialog box, and Photoshop fills the transparent area surrounding the letters with white. By setting the blend mode to Multiply, the black letters were not affected:
Only the transparent area around the text was filled with white.
You can turn the Background layer back on at this point by clicking again on the layer's visibility icon. We only turned if off temporarily so we could see what was happening with the Fill command on the text layer:
Clicking again on the Background layer's visibility icon.
Step 7: Apply The Gaussian Blur Filter
We need to add a small amount of blurring to our text, and we can do that with the Gaussian Blur filter. Go up to the Filter menu at the top of the screen, choose Blur, then choose Gaussian Blur:
Going to Filter > Blur > Gaussian Blur.
When the Gaussian Blur dialog box opens, drag the slider at the bottom to set the Radius value to around 4 pixels:

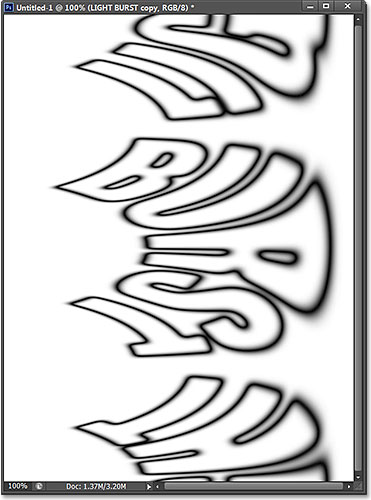
Setting the Radius value to 4 pixels.
Click OK to close out of the dialog box. Here's my text with the blurring applied:

The text after applying the Gaussian Blur filter.
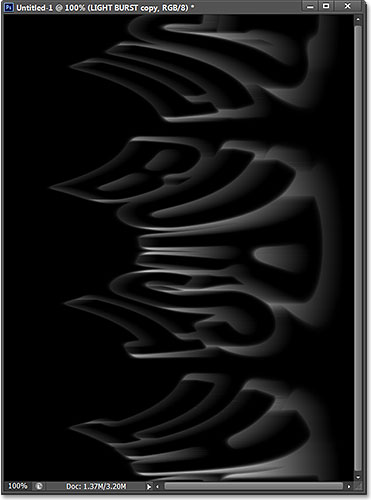
Step 8: Apply The Solarize Filter
Once again go up to the Filter menu at the top of the screen but this time, choose Stylize, then choose Solarize:
Going to Filter > Stylize > Solarize.
There's no dialog box for the Solarize filter. Photoshop simply applies it to the text layer, and now the text appears as a light gray outline against a black background:
The text after applying the solarize filter.
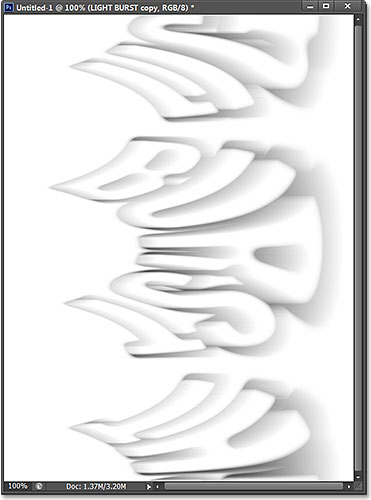
Step 9: Lighten The Text With Auto Tone
We need to brighten up the text and we can do that very quickly using one of Photoshop's Auto image adjustments. Go up to the Image menu at the top of the screen and choose Auto Tone. For our purposes here, it really doesn't matter if you choose Auto Tone, Auto Contrast or Auto Color since we're essentially working with a black and white image. I chose Auto Tone only because it's the first one in the list:
Going to Image > Auto Tone.
With Auto Tone applied, the text now appears much brighter:
The text after applying the Auto Tone adjustment.
Step 10: Duplicate The Text Layer
We need to make a copy of our text layer. Go up to the Layer menu at the top of the screen, choose New, then choose Layer via Copy. Or, a faster way to duplicate a layer is by simply pressing Ctrl+J (Win) / Command+J (Mac) on your keyboard:

Going to Layer > New > Layer via Copy.
A copy of the text layer appears above the original in the Layers panel:
The Layers panel showing the copy of the text layer.
Step 11: Apply The Polar Coordinates Filter
With the copy of the text layer selected (highlighted in blue) in the Layers panel, go up to the Filter menu at the top of the screen, choose Distort, then choose Polar Coordinates:
Going to Filter > Distort > Polar Coordinates.
When the Polar Coordinates dialog box opens, select the Polar to Rectangular option at the very bottom, then click OK to close out of the dialog box:
Selecting the Polar to Rectangular option.
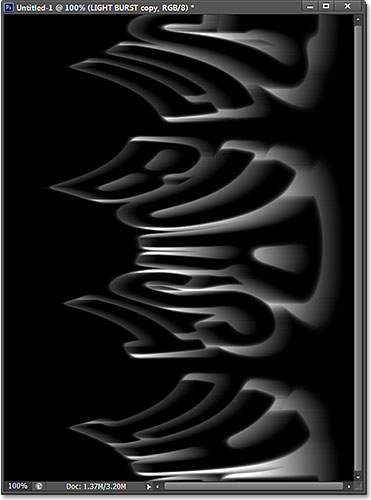
Your text will now look something like this:
The text after applying the Polar Coordinates filter.
Step 12: Rotate The Image
In a moment, we're going to apply Photoshop's Wind filter to the image, but the Wind filter only works horizontally, so before we run it, we need to rotate our image onto its side. To do that, go up to the Image menu at the top of the screen, choose Image Rotation, then choose 90° CW (clockwise):
Going to Image > Image Rotation > 90° CW.
The image should now be rotated clockwise:
The image rotated 90° clockwise.
Step 13: Invert The Image
Next, we need to invert the image, making the black areas white and the white areas black. Go up to the Image menu, choose Adjustments, then choose Invert. Or, press Ctrl+I (Win) / Command+I (Mac) on your keyboard:
Going to Image > Adjustments > Invert.
The image is now inverted:
The image after inverting the brightness values.
Step 14: Apply The Wind Filter Three Times
To create what will eventually become the beams of light, we'll use the Wind filter. Go up to the Filter menu, choose Stylize, then choose Wind:

Going to Filter > Stylize > Wind.
When the Wind dialog box appears, set the Method option to Wind, then set the Direction option to From the Right:
The Wind filter options.
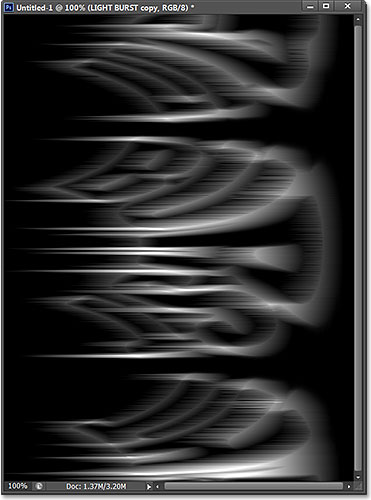
Click OK to close out of the dialog box. Photoshop will apply the Wind filter to the image. We actually need to apply the filter two more times, but rather than selecting it again from the Filter menu, simply press Ctrl+F (Win) / Command+F(Mac) on your keyboard. This is a handy shortcut for re-applying the last filter that was used (along with the settings that were used). Press Ctrl+F (Win) / Command+F (Mac) again to re-apply the Wind filter a second time (so it's now been applied a total of three times). Your image should now look something like this:
The image after applying the Wind filter three times.
Step 15: Invert The Image Again
Next, we need to re-invert the image, so once again go up to the Image menu, choose Adjustments, then choose Invert, or press Ctrl+I (Win) / Command+I (Mac) on your keyboard:
Going to Image > Adjustments > Invert.
The text once again appears light gray against a black background:
The image after inverting it again.
Step 16: Brighten The Text Again With Auto Tone
Let's again make the text brighter by going back up to the Image menu and choosing Auto Tone:
Going back to Image > Auto Tone.
And once again, the text appears brighter:
The text after re-applying the Auto Tone command.
Step 17: Re-Apply The Wind Filter Three More Times
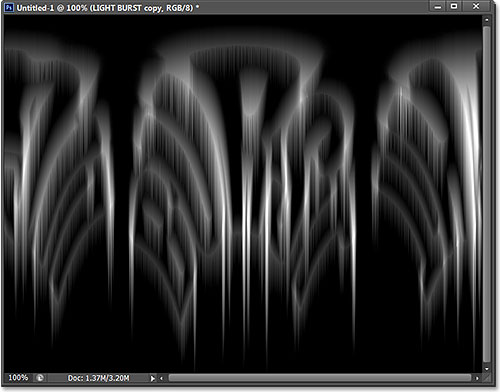
Press Ctrl+F (Win) / Command+F (Mac) on your keyboard three times to re-apply the Wind filter three more times to the image:
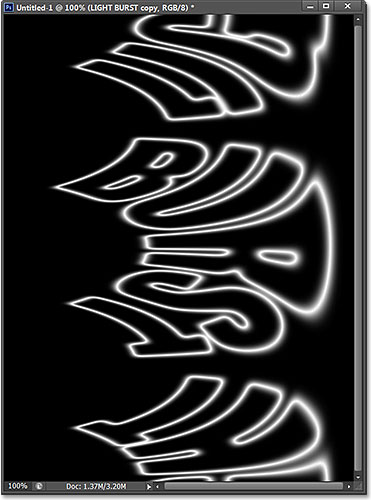
The image after applying the Wind filter three more times.
Step 18: Rotate The Image
We're done with the Wind filter, so let's rotate the image back to its original orientation. Go up to the Image menu, choose Image Rotation, then choose 90° CCW (counterclockwise):

Going to Image > Image Rotation > 90° CCW.
The image is now back to its original position:
The image after rotating it counterclockwise.
Step 19: Apply The Polar Coordinates Filter Again
Go up to the Filter menu, choose Distort, then choose Polar Coordinates. This time when the dialog box appears, select the Rectangular to Polar option at the bottom:
Selecting the Rectangular to Polar option.
Click OK to apply the Polar Coordinates filter and exit out of the dialog box. The light burst effect is now starting to take shape:
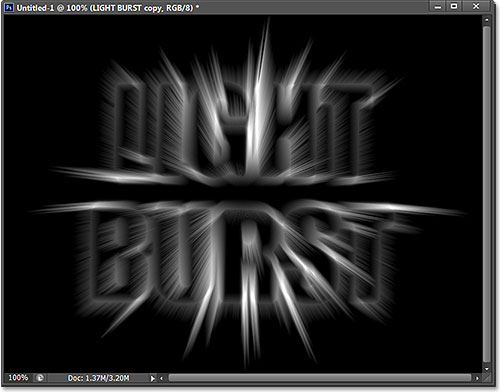
The image after re-applying the Polar Coordinates filter.
Step 20: Change The Layer Blend Mode To Screen
Next, we need to allow our original text layer below to show through the light beams, and we can do that by simply changing the top layer's blend mode. You'll find the Blend Mode option in the top left corner of the Layers panel (it's the box that's set to Normal by default). Click on the box and select Screen from the list of blend modes that appears:

Changing the layer's blend mode from Normal to Screen.
With the blend mode set to Screen, the light beams now appear to shine through the text:
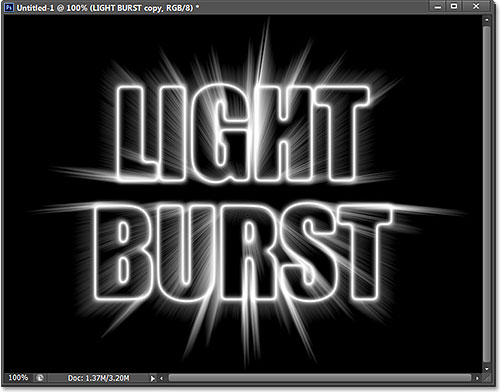
The effect after changing the blend mode to Screen.
Step 21: Add A Gradient Fill Layer
Let's add some much needed color to the effect, and we'll do that using a Gradient Fill layer. Click on the New Fill or Adjustment Layer icon down at the bottom of the Layers panel:
Clicking the New Fill or Adjustment Layer icon.
Select Gradient near the top of the list:
Adding a Gradient fill layer.
This opens the Gradient Fill dialog box. Click on the gradient preview bar at the top to open the Gradient Editor:
Clicking the gradient preview bar.
When the Gradient Editor appears, select the Black, White preset gradient by clicking on its thumbnail at the top of the dialog box (third thumbnail from the left, top row). This will give us a starting base for the gradient and, most importantly, will make sure that both colors are set to 100% opacity:
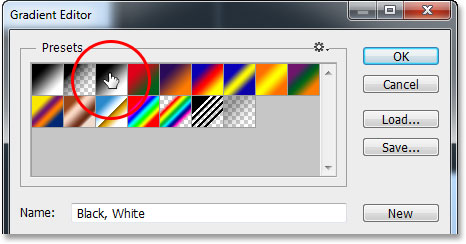
Clicking on the Black, White gradient's thumbnail.
The bottom half of the Gradient Editor is where we can actually edit the gradient. Double-click on the black-filled color stop below the left end of the large gradient preview bar:
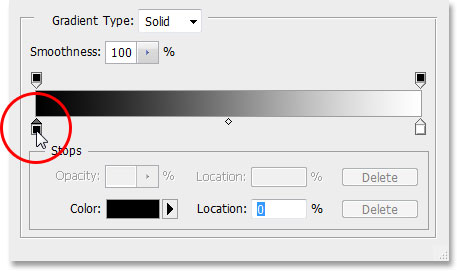
Double-clicking the black-filled color stop on the left.
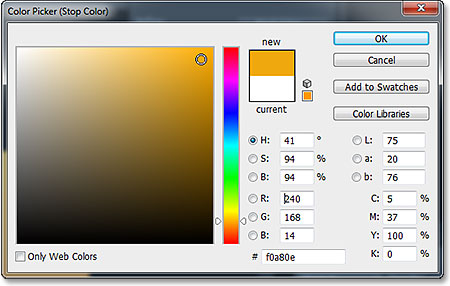
This will open Photoshop's Color Picker where we can replace the black in the gradient with whatever color we like. I'll choose a reddish orange color. Click OK once you've chosen a new color to close out of the Color Picker:
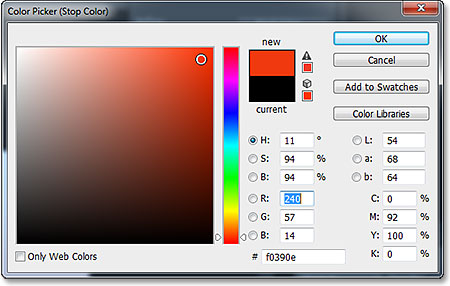
Choosing a new color for the left side of the gradient.
Then, do the same thing with the other side of the gradient in the Gradient Editor. Double-click on the white-filled color stop below the right side of the gradient preview bar:
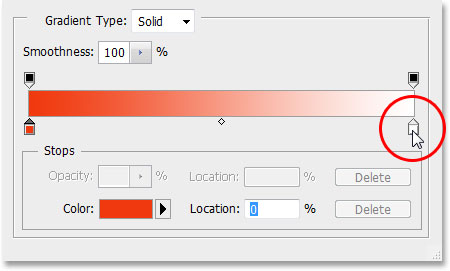
Double-clicking the white-filled color stop on the right.
Choose a new color for the right side of the gradient from the Color Picker. I'll choose an orange-yellow. Click OK when you're done to again close out of the Color Picker:
Choosing a new color for the right side of the gradient.
Here's my edited gradient with its new custom colors. If you're happy with the colors you chose, click OK to close out of the Gradient Editor, then click OK to close out of the Gradient Fill dialog box:
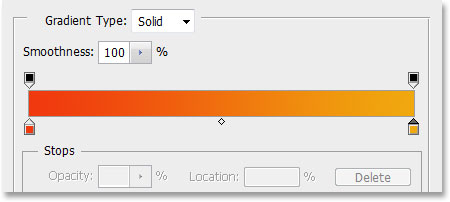
The new custom gradient.
Step 22: Change The Blend Mode Of The Gradient Fill Layer To Color
At the moment, the gradient will be filling the entire document from top to bottom, which obviously isn't what we want. We just want it to colorize our text and the beams of light. To fix the problem, all we need to do is change the blend mode for the Gradient fill layer from Normal to Color:
Changing the blend mode of the Gradient fill layer to Color.
With the blend mode set to Color, the effect is now colorized by the gradient:
The effect after changing the blend mode to Color.
Step 23: Convert The Original Text Layer To A Smart Object
We have one last filter to apply to the effect and it needs to be applied to the original text layer, so first, click on the original text layer in the Layers panel to select it and make it active:
Selecting the original text layer.
The filter we're going to use is Radial Blur, but the problem with Radial Blur is that it doesn't give us a live preview of the results, which means we can't see the blur effect until we've actually applied the filter, and that's a lousy way to work. Fortunately, there's an easy way to solve the problem, and that's by first converting the layer into a Smart Object. With the original text layer selected, click on the small menu icon in the top right corner of the Layers panel:
Clicking the menu icon.
Choose Convert to Smart Object from the menu that appears:
Choosing the Convert to Smart Object command.
Nothing will happen in the document window, but a small Smart Object icon appears in the bottom right corner of the layer's preview thumbnail in the Layers panel, letting us know the layer is now a Smart Object:
The layer is now a Smart Object.
Step 24: Apply A Radial Blur Smart Filter
Any filters we now apply to our Smart Object will become Smart Filters, and the great thing about Smart Filters is that we can go back and change the filter settings as many times as we want without making any permanent changes (or damage) to the image. Let's apply the Radial Blur filter. Go up to the Filter menu, choose Blur, then choose Radial Blur:
Going to Filter > Blur > Radial Blur.
This opens the Radial Blur dialog box. Set the Blur Method to Zoom and the Quality to Best, then set the Amountvalue at the top to around 65 by dragging the slider. Don't worry about getting the Amount value exactly right because, since it's a Smart Filter, we can always go back and change it later:
The Radial Blur dialog box.
Click OK to close out of the dialog box. Here's the effect with Radial Blur applied:
The effect after applying the Radial Blur filter.
If you look at the text layer in the Layers panel, you'll see the Radial Blur Smart Filter listed directly below it. If you want to try a different Amount value for the blur, simply double-click on the filter's name to re-open the Radial Blur dialog box, then set your new Amount value. Click OK to close out of the dialog box and Photoshop will update the results in the document window. You can do this as many times as you like without damaging the image:
Double-click on the Radial Blur Smart Filter to re-open its dialog box if needed.
Step 25: Add A New Blank Layer
We're almost done. Click on the New Layer icon at the bottom of the Layers panel:
Clicking the New Layer icon.
Photoshop adds a new blank layer named Layer 1 between the two text layers:
The Layers panel showing the new blank layer.
Step 26: Load The Selection From The Channels Panel
Remember that selection we saved way back in Step 5? It's finally time to load it. To do that, switch back over to the Channels panel (beside the Layers panel) by clicking on its name tab. Then, press and hold your Ctrl (Win) / Command (Mac) key on your keyboard and click on the Alpha 1 channel below the Red, Green and Blue channels:
Hold Ctrl (Win) / Command (Mac) and click on Alpha 1.
This loads the selection, and the selection outline re-appears in the document:

The selection outline from the original text re-appears.
Step 27: Fill The Selection With Black
Switch back over to your Layers panel by clicking on its name tab, then go up to the Edit menu and choose Fill:
Going to Edit > Fill.
In the Fill dialog box, set the Use option to Black and the Blending Mode to Normal:
Make sure the Blending Mode is set to Normal this time, not Multiply.
Click OK to close out of the Fill dialog box. Photoshop fills the selection with black. To quickly remove the selection outline, just press Ctrl+D (Win) / Command+D (Mac) on your keyboard. And with that, we're done! Here is my final effect:

The final result.
And there we have it! That's how to create a colorful light burst text effect in Photoshop CS6. Check out our Text Effects or Photo Effects sections for more Photoshop effects tutorials!